DIY Dream Mouse House
I’d love to connect with you on Instagram, where I share home, health and lifestyle tips!

If you have toured Poppy’s Mouse house and can’t get enough of those little mice… Look no further for more mouse inspiration! I was a bit jealous of the thought of giving away all my hard work, so I decided to simultaneously renovate 2 vintage dollhouses at once so that we could keep one and I decided to go ALL OUT. This home is too fragile for Cohen to play with right now. In the meantime, he is enjoying his Toddler Mouse house and you can follow that link for ideas to make your own for a toddler!
For even more ideas on how to make your own Mouse House please refer to my other article to tour Poppy’s Mouse House. MY BIGGEST tips for making your own Mouse House is to start with a solid home and CHECK SIZES, CHECK SIZES, CHECK SIZES. I must have incorrectly bought about 5 or 6 items that ended up being WAY too big for the homes. Read the “details” of any item you like and CHECK WITH A RULER!!! You lose time and money having to return items and it’s a hassle.
I hot-glued any small items in the home down using “Gorilla Hot Glue,” which is suppossedly 5x stronger than regular hot glue. One of my favorite parts about working in mini-scale is that you can use some really gorgeous and expensive fabrics for pillows, curtains, etc. because you only need a tiny amount.
Scroll to the end for a VERY BIG surprise announcement about our family!!!
THE HOUSE
I found the house for $80 from Facebook Marketplace and I really scored a deal. The house is extremely sturdy/well made and required NO painting or restorative work (this is super important when choosing a dollhouse).
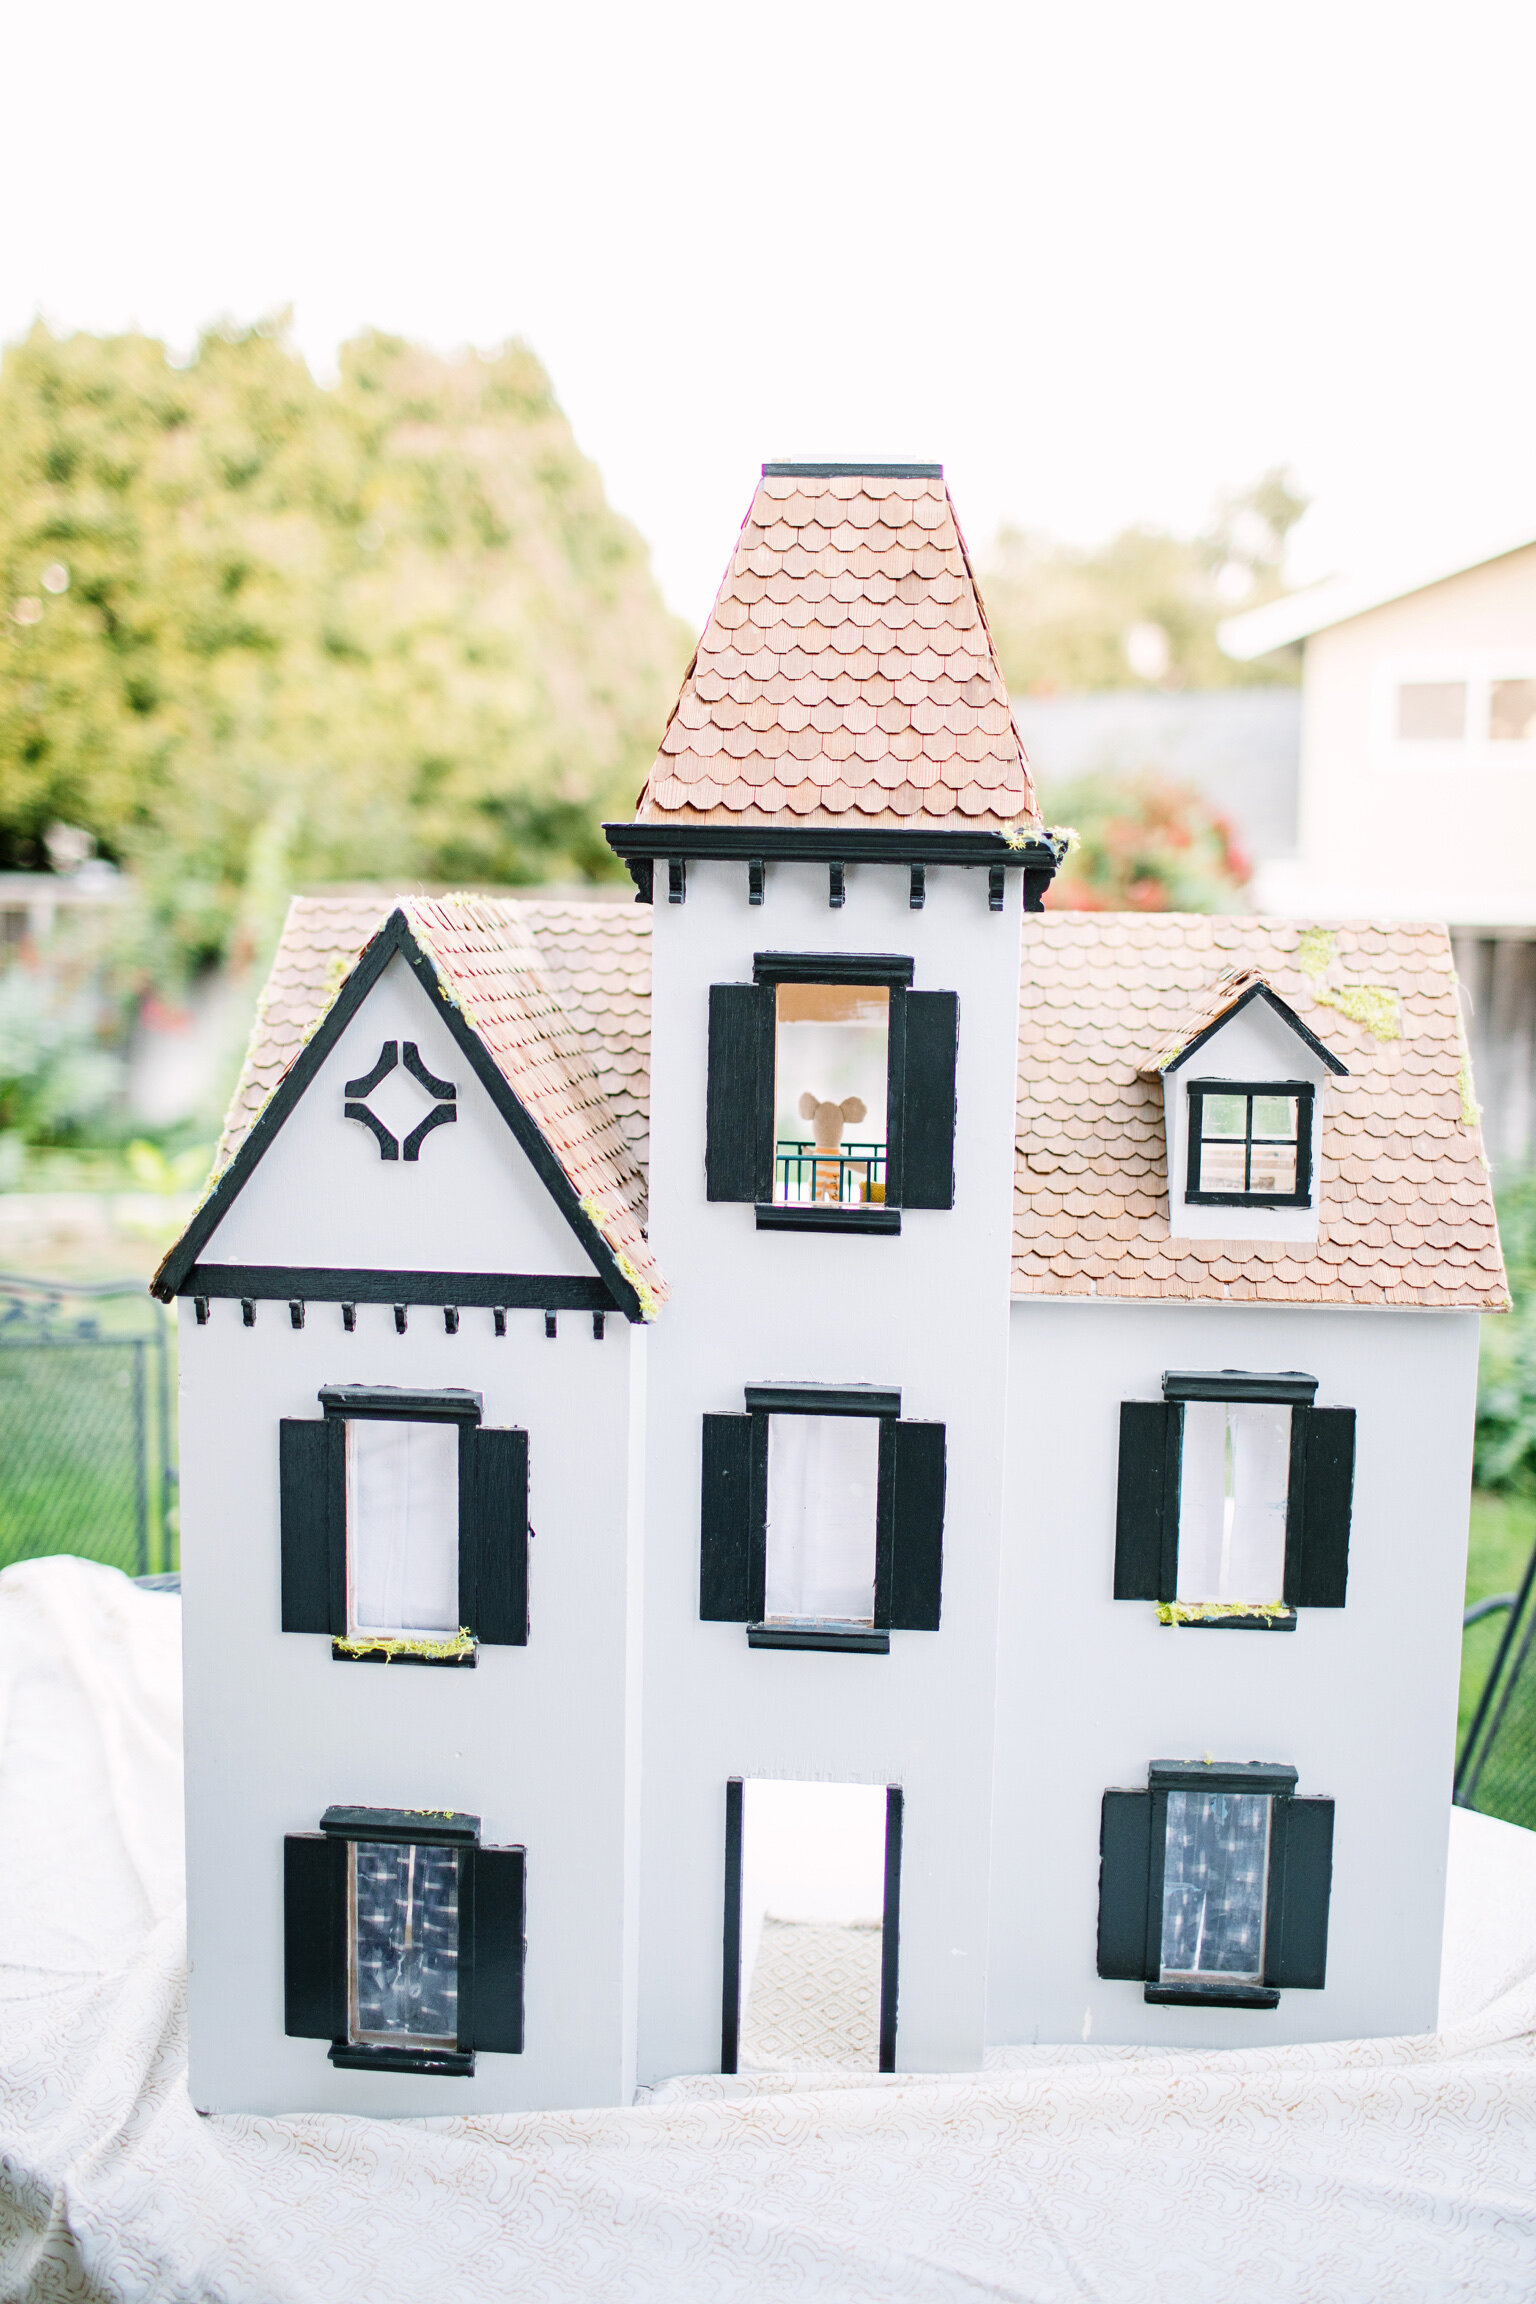
Vintage Doll House was $80 from Facebook Marketplace.
CHEESE CELLAR
The Cheese Cellar was my first idea for the home. I went to Whole Foods and Cowgirl Creamery in San Francisco and they both gave me cheese labels that I could shrink down with a copy machine. I printed them on card stock. After making and cutting out the labels, I used FIMO clay to form the size and shape of each wheel/block of cheese, then hot-glued the label to the each wheel of baked FIMO clay cheese. The “shelves” are coffee stir sticks cut to size. I hope to expand the collection to all 3 walls one day!
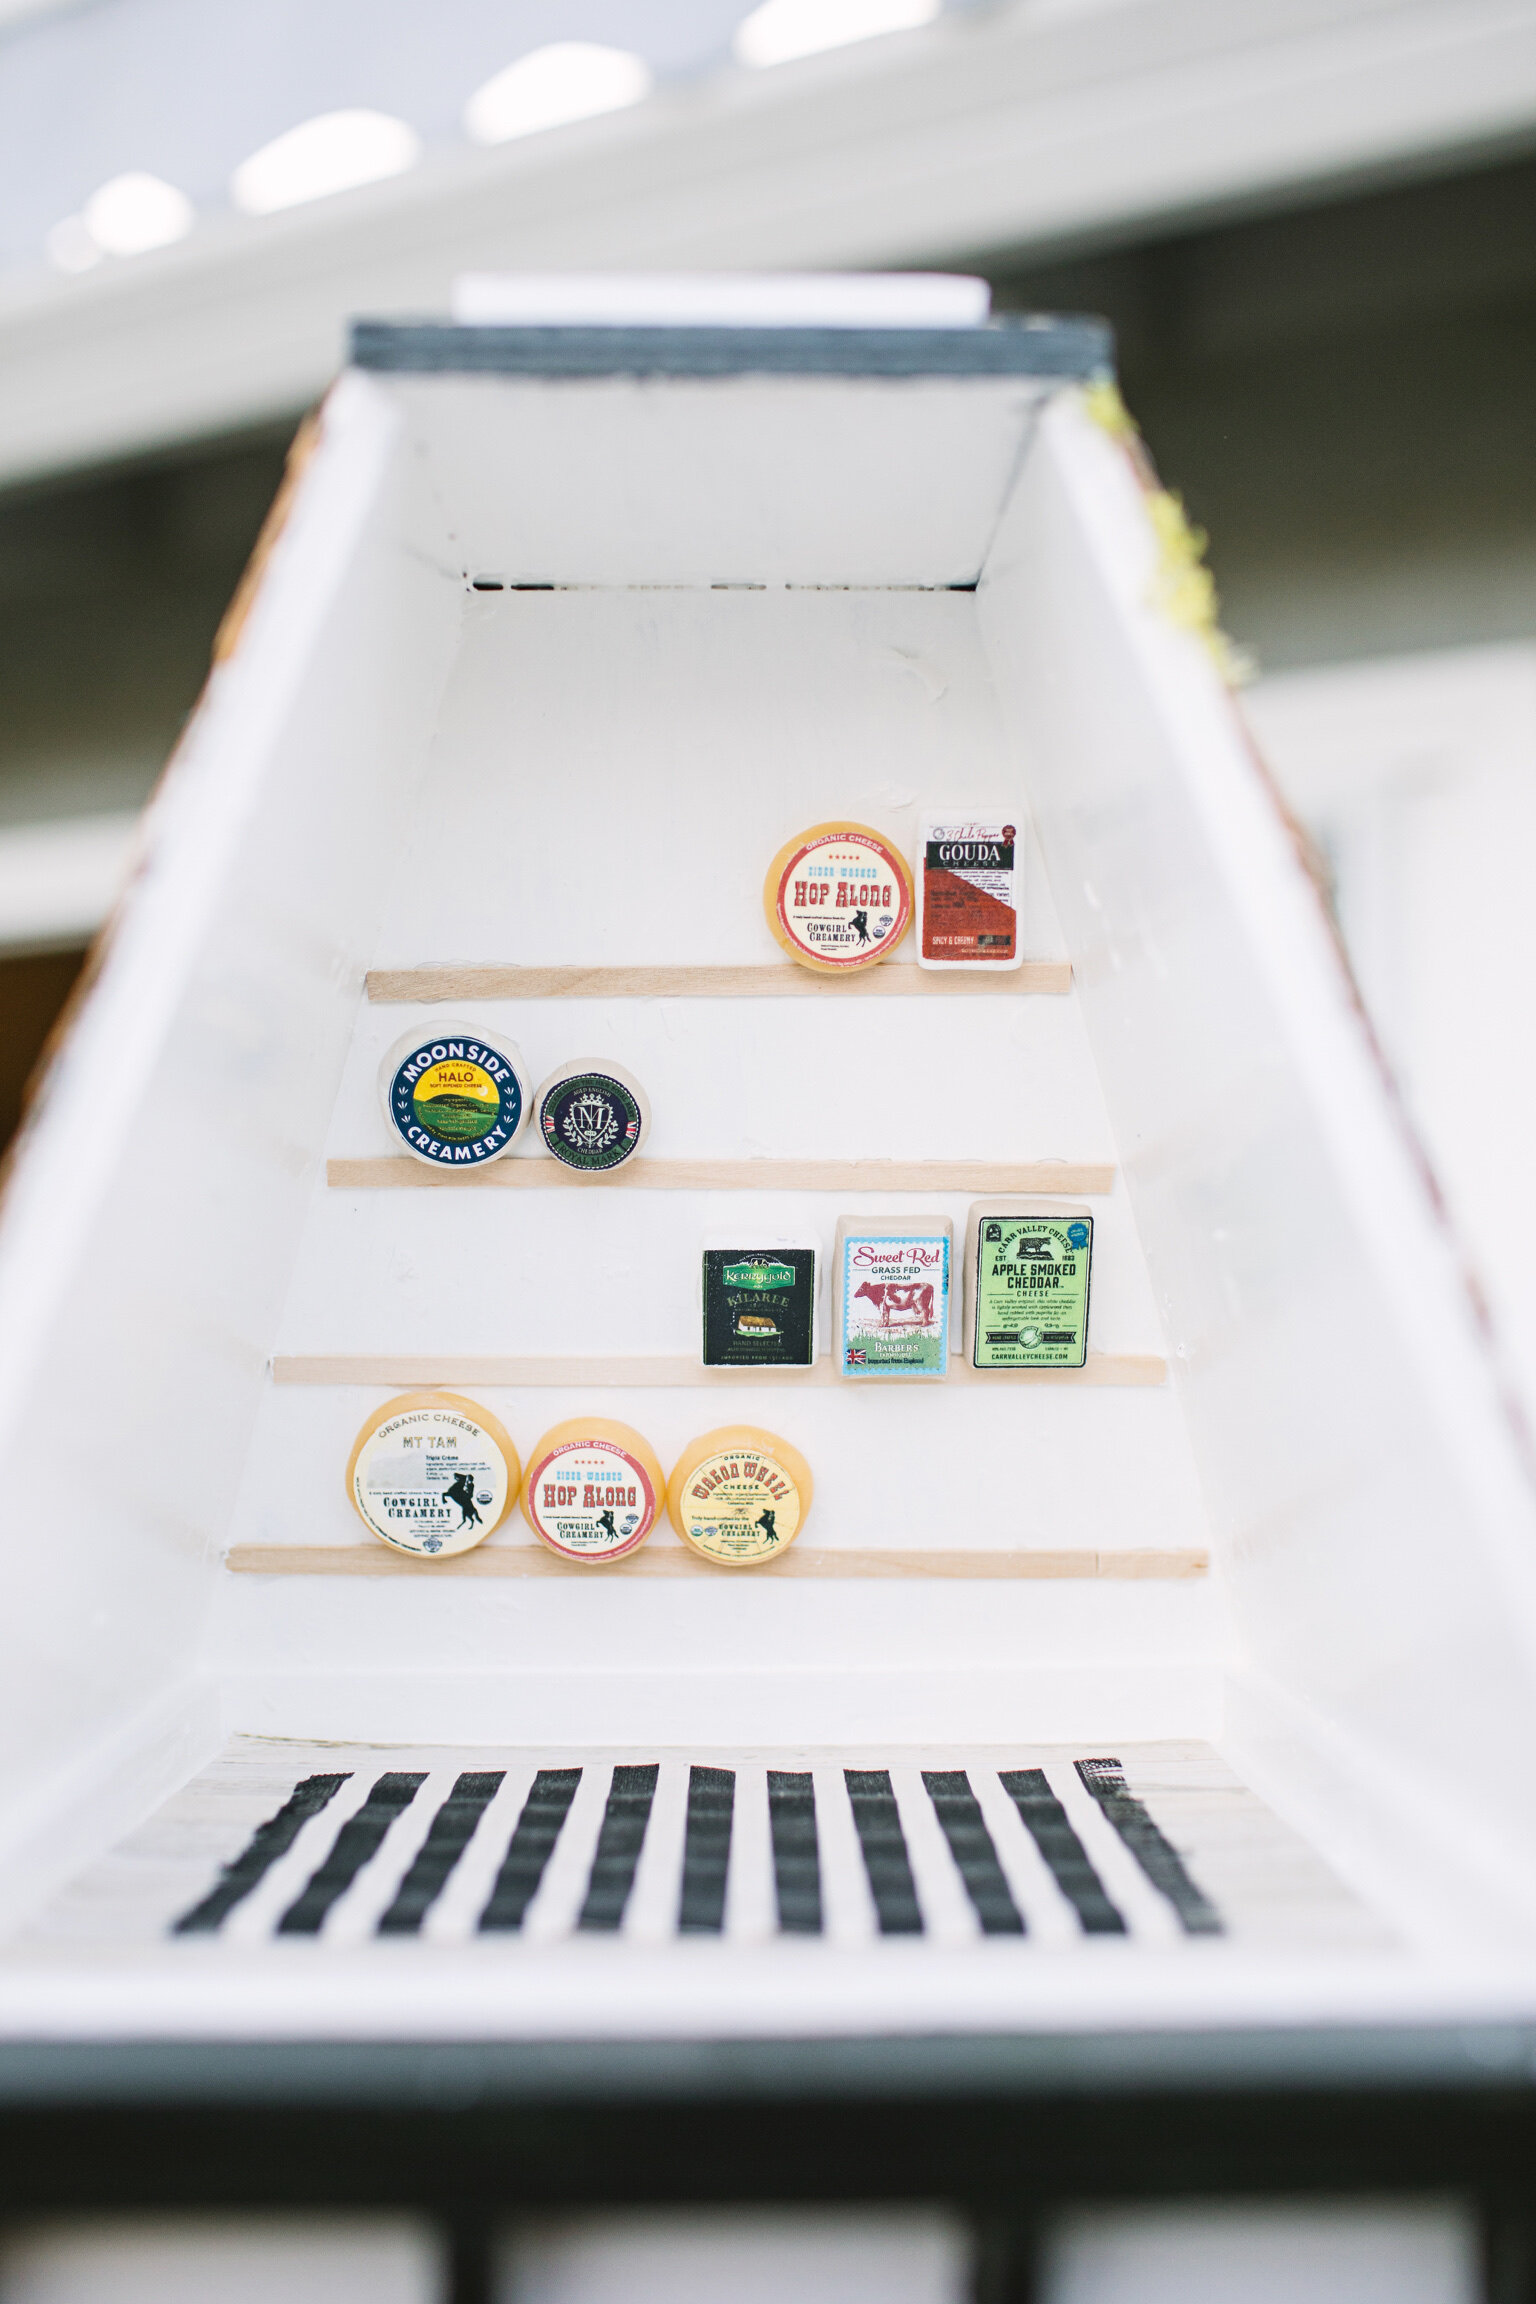
I can’t imagine a better mouse fantasy than a well-stocked room of Cowgirl Creamery!! If you have never tried Mt Tam (triple cream, like brie), check your local Whole Foods! It’s so creamy and delicious, your guests will squeak with delight! Black and White Rug from Etsy.
KIDS’ ROOM
The Kids’ room was far and away the hardest room for me. I finished it, then completely redid it when I didn’t love the way it looked. My incredibly talented friend in LA (whom I like to call “interior designer to the stars”), Merissa Haas, must have had 75 separate texts about this room.
The Beds are from the Japanese Dollar store, Daiso. I made the bedding with waxed canvas and cotton balls. I painted the rug design with interior flat pain and used a ruler and a Sharpie to complete the project. The tiny books are from Cozy Shacks on Etsy. The Wanes coating/Bead Board is a bunch of painted and cut thick popsicle sticks that I hot-glued side by side. I used a small plastic trip to complete the look (from Hobby Lobby).

Ostrich print is called “running errands,” printed with permission from Copper Corners. Frame is made with coffee stir sticks. Plant is from Hobby Lobby. Garden Workbench is from Etsy (but I can’t find it anymore!). Baby seat is called “My Babysitter’ from Maileg. Tiny Books are from Etsy.

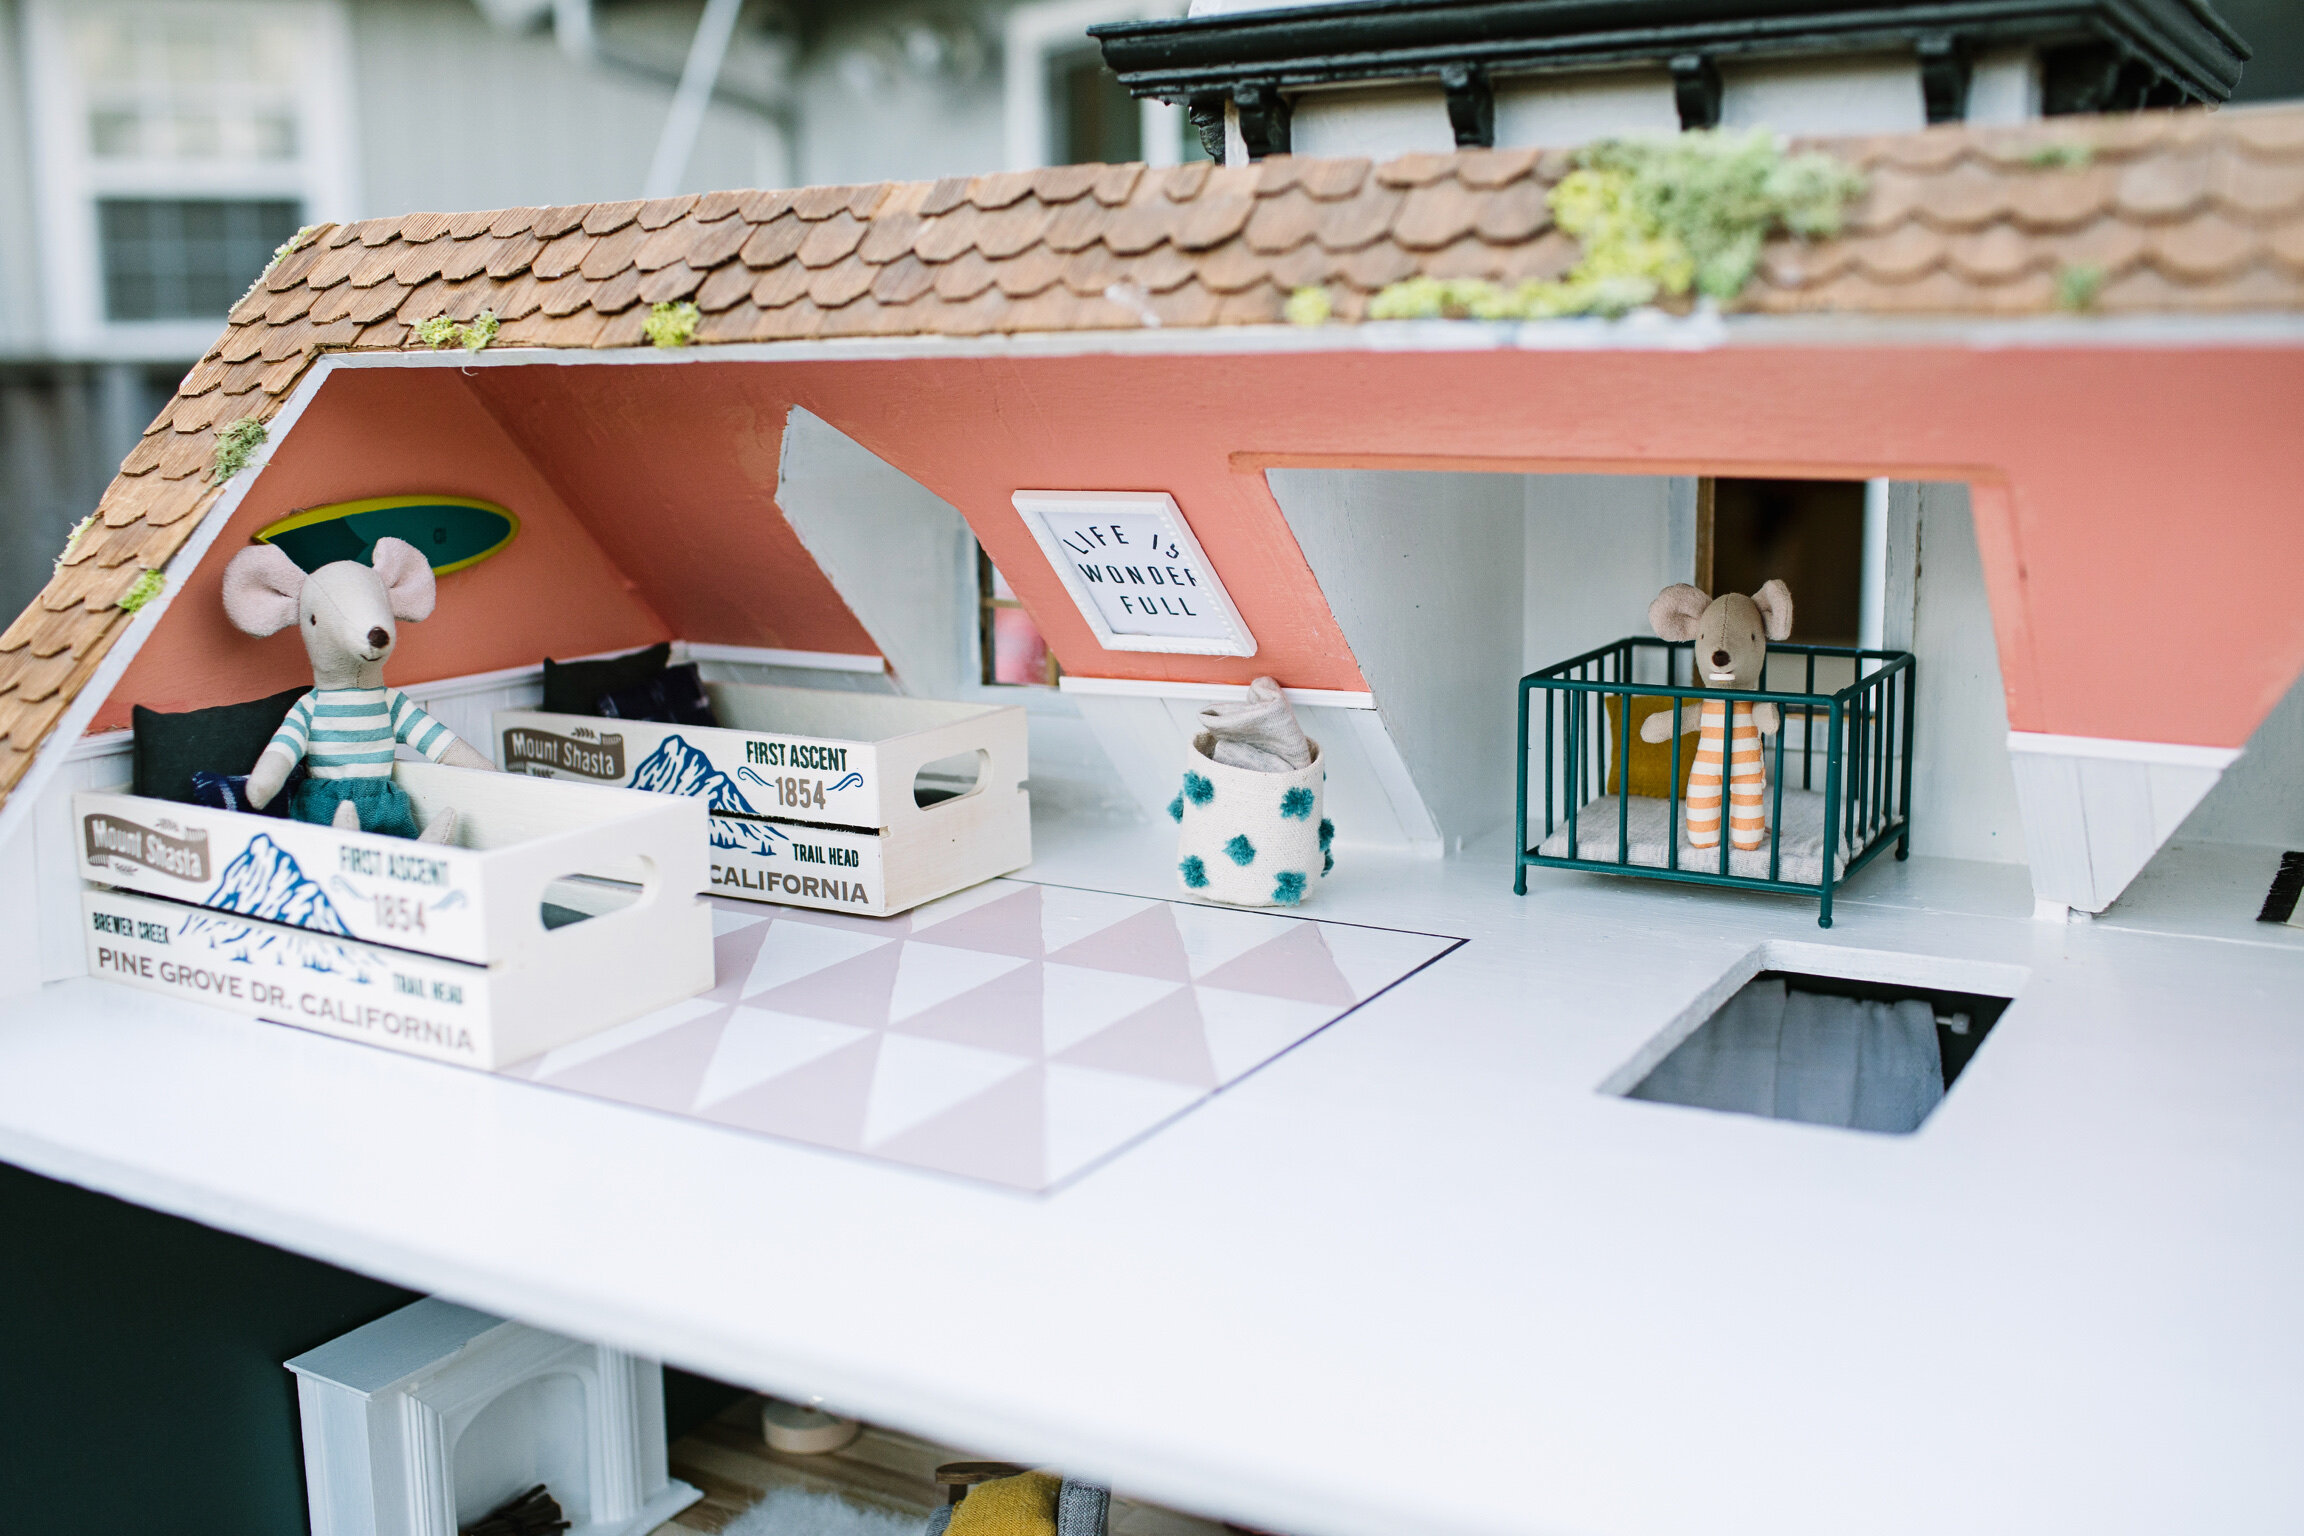
Playpen is spray painted green from Maileg. I cut a small piece from a Solly Swaddle (an absolute must-have for any new mom!) to make the Solly Crib Sheets and Solly Swaddles in “flax.”

“Life is Wonderful” printed with permission from Rylee and Cru. Solly swaddle replicas made in Flax color. Pehr Pom Bin replica hand-sewn from canvas and embroidery floss.

Sun art is a patch from Meri Meri, hot-glued to wall. The toilet was the hardest item to find in any dollhouse and is from Amazon (and absolutely perfect!). Black and white striped rug is from Etsy. Oops! We’re out of TP (the house came with that installed).
MASTER SUITE
The master suite was far and away the easiest space for me to put together. I absolutely fell in LOVE with this moose head and Merissa Haas (my fabulous interior-design consultant on the project) said it was simply a MUST! I named him Murphy, from the movie “You, Me, and Dupree.” The artist, Victoria from Miniature Animals” hand carves each animal and her work is simply AMAZING. Be sure to check it out and you will be in awe! The hardwood flooring is actually cut thick popsicle sticks that I hot-glued down!!
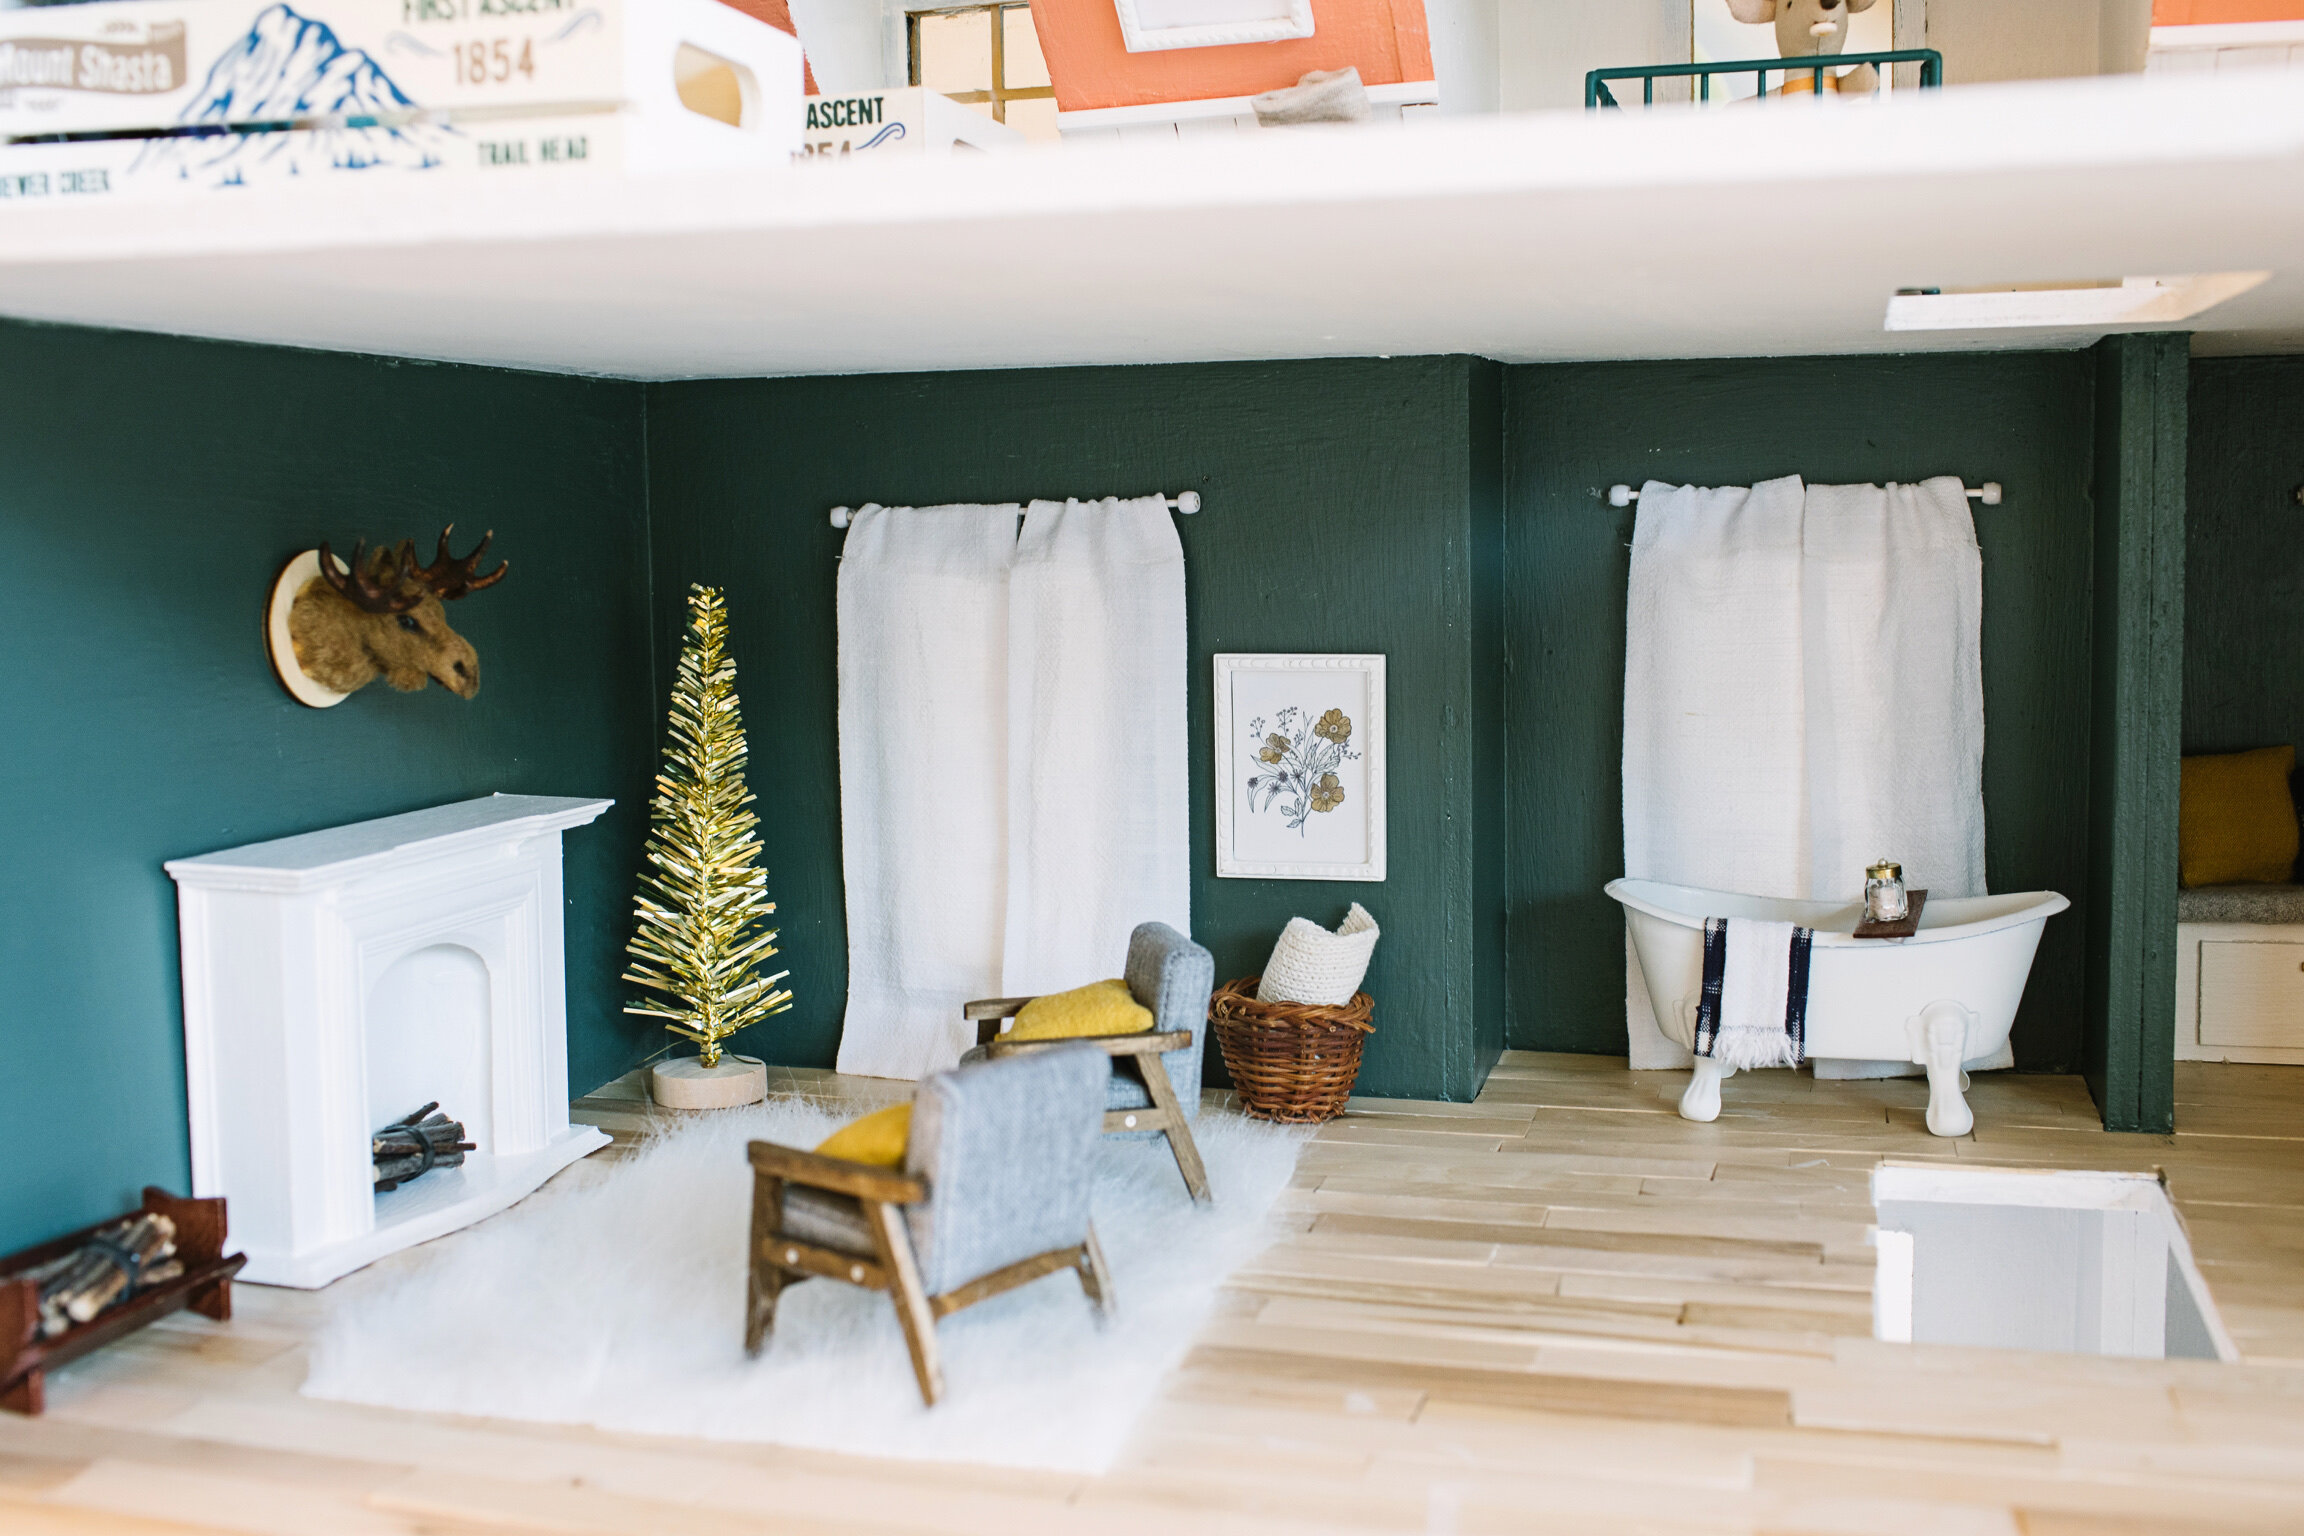
Christmas tree is from the dollar section at Target. Faux fur rug is fabric from Joanns (it’s a bit messy to cut). Chairs are part of a set from Etsy that I used in the 2 different homes. I made curtains, threaded them through a painted bamboo skewer and hot glued plastic beads on the end. They are attached to the wall with “mini screw eye pins.” See below for info on other items.
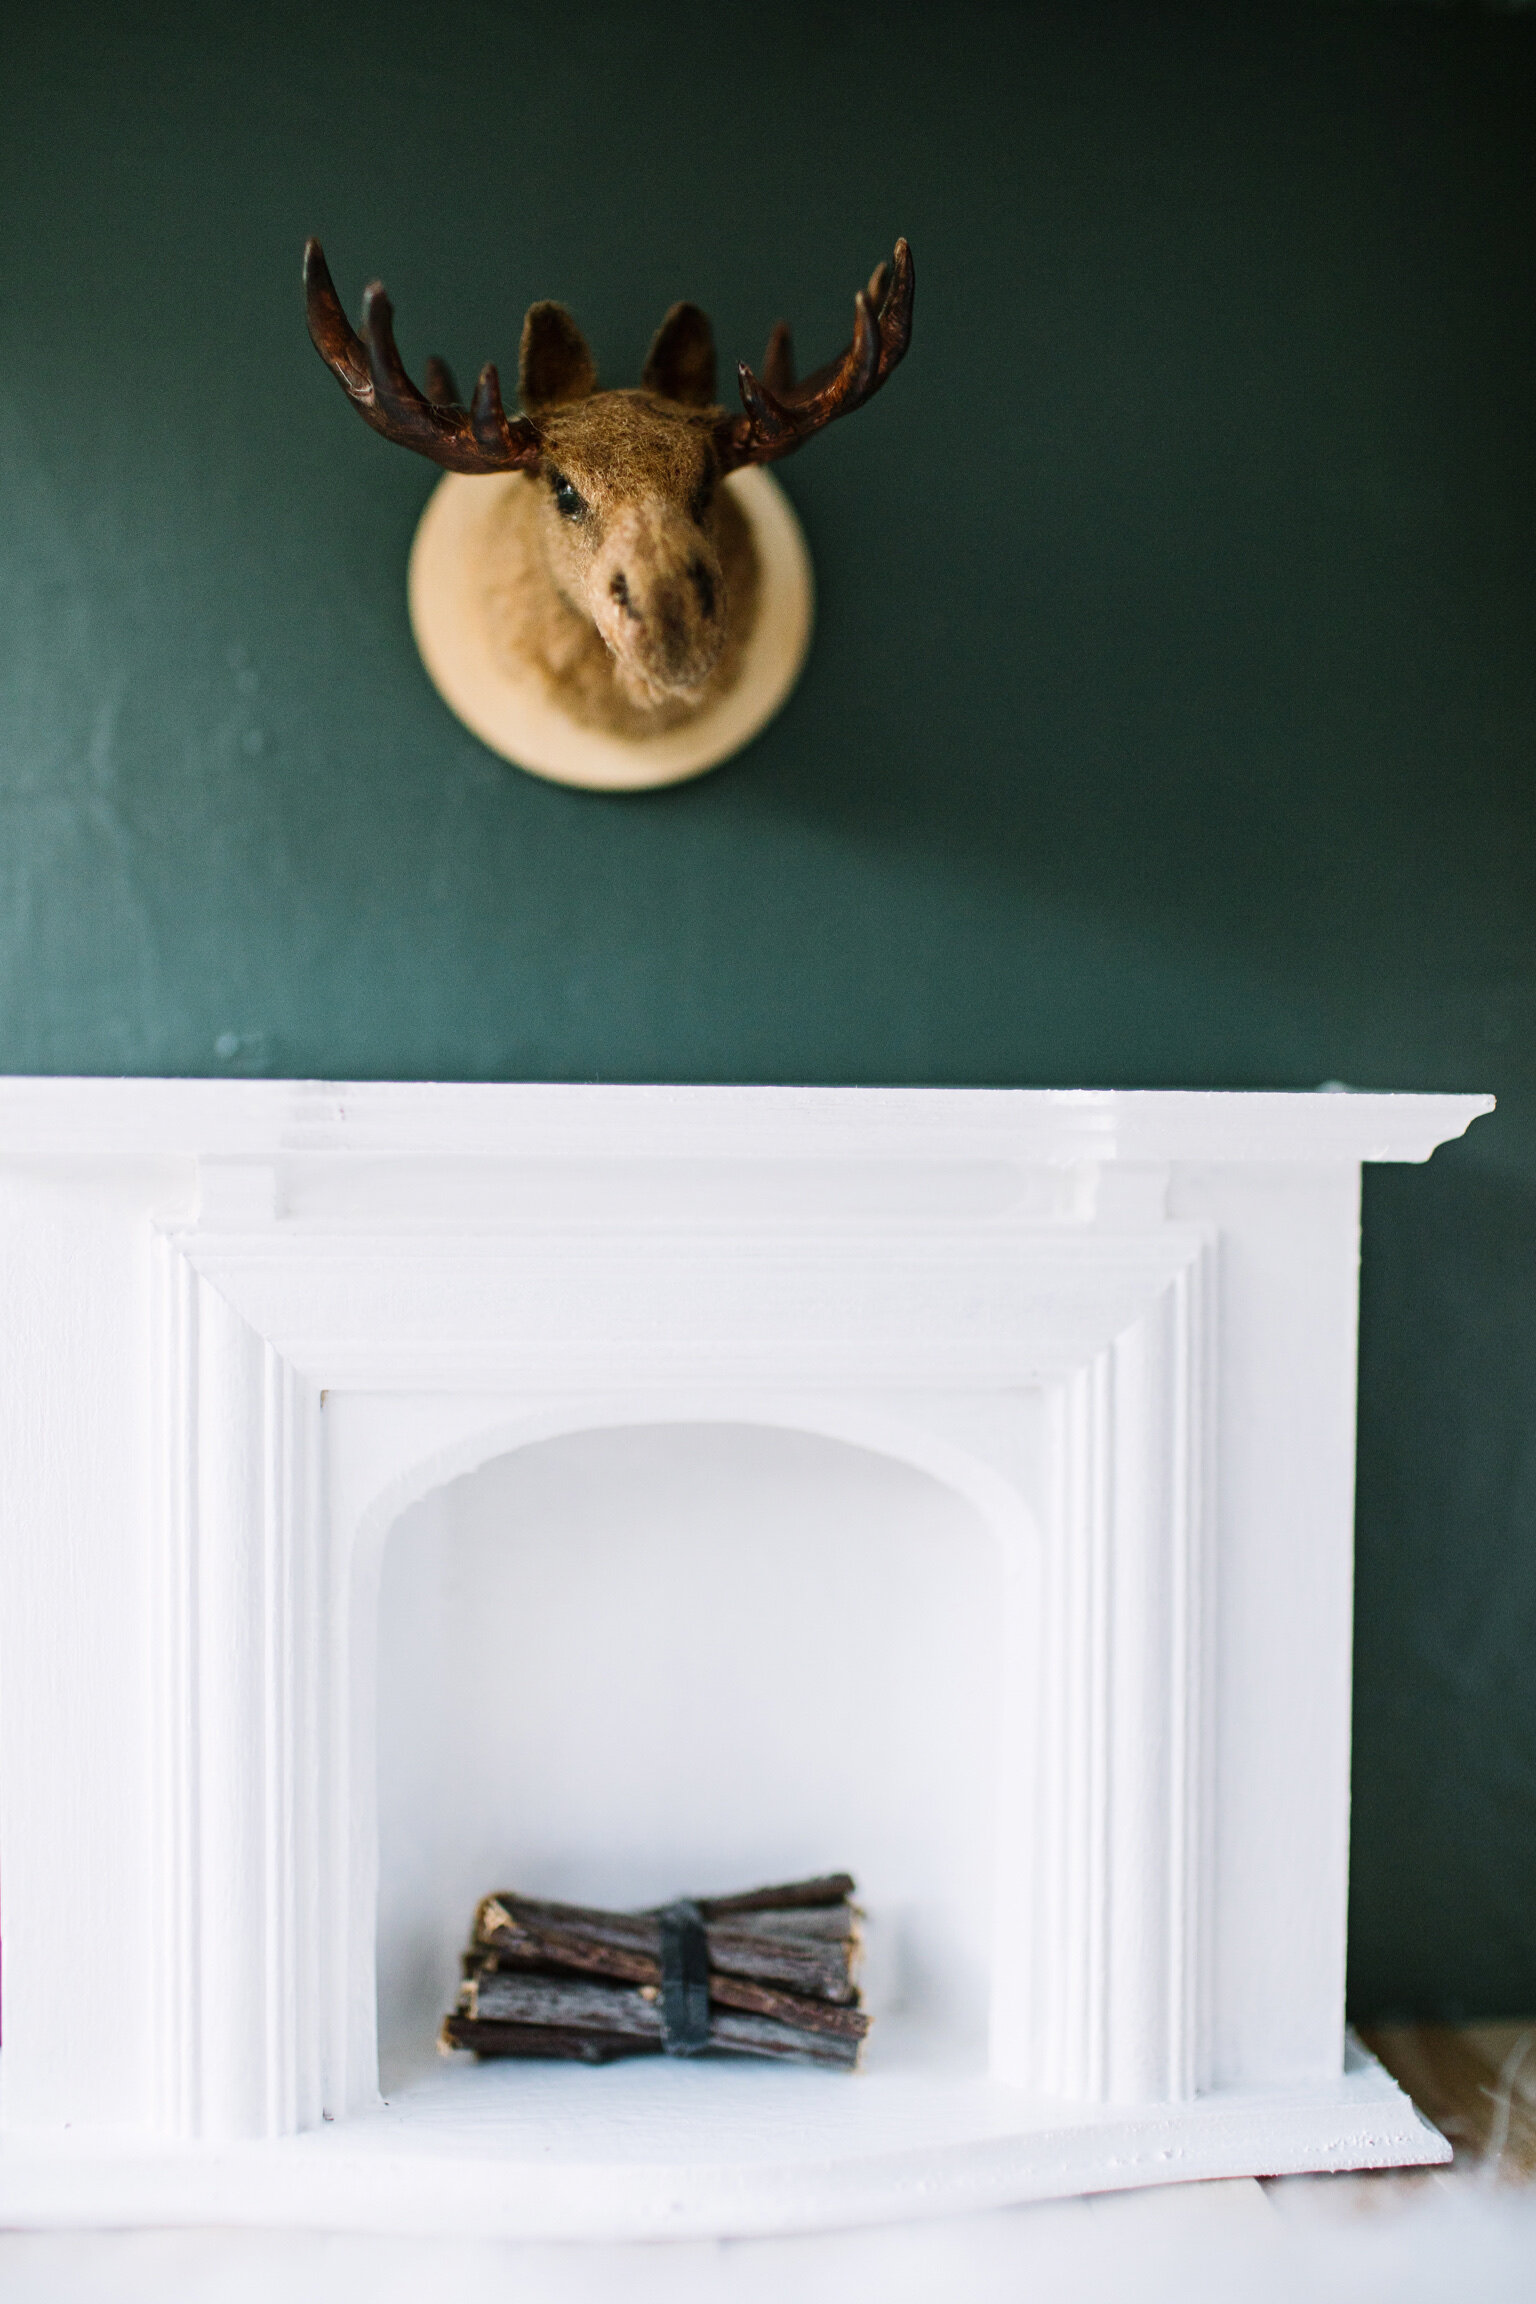
Murphy the Moose Head in all his glory!! Fireplace is painted white, from Etsy. Firewood from Hobby Lobby.
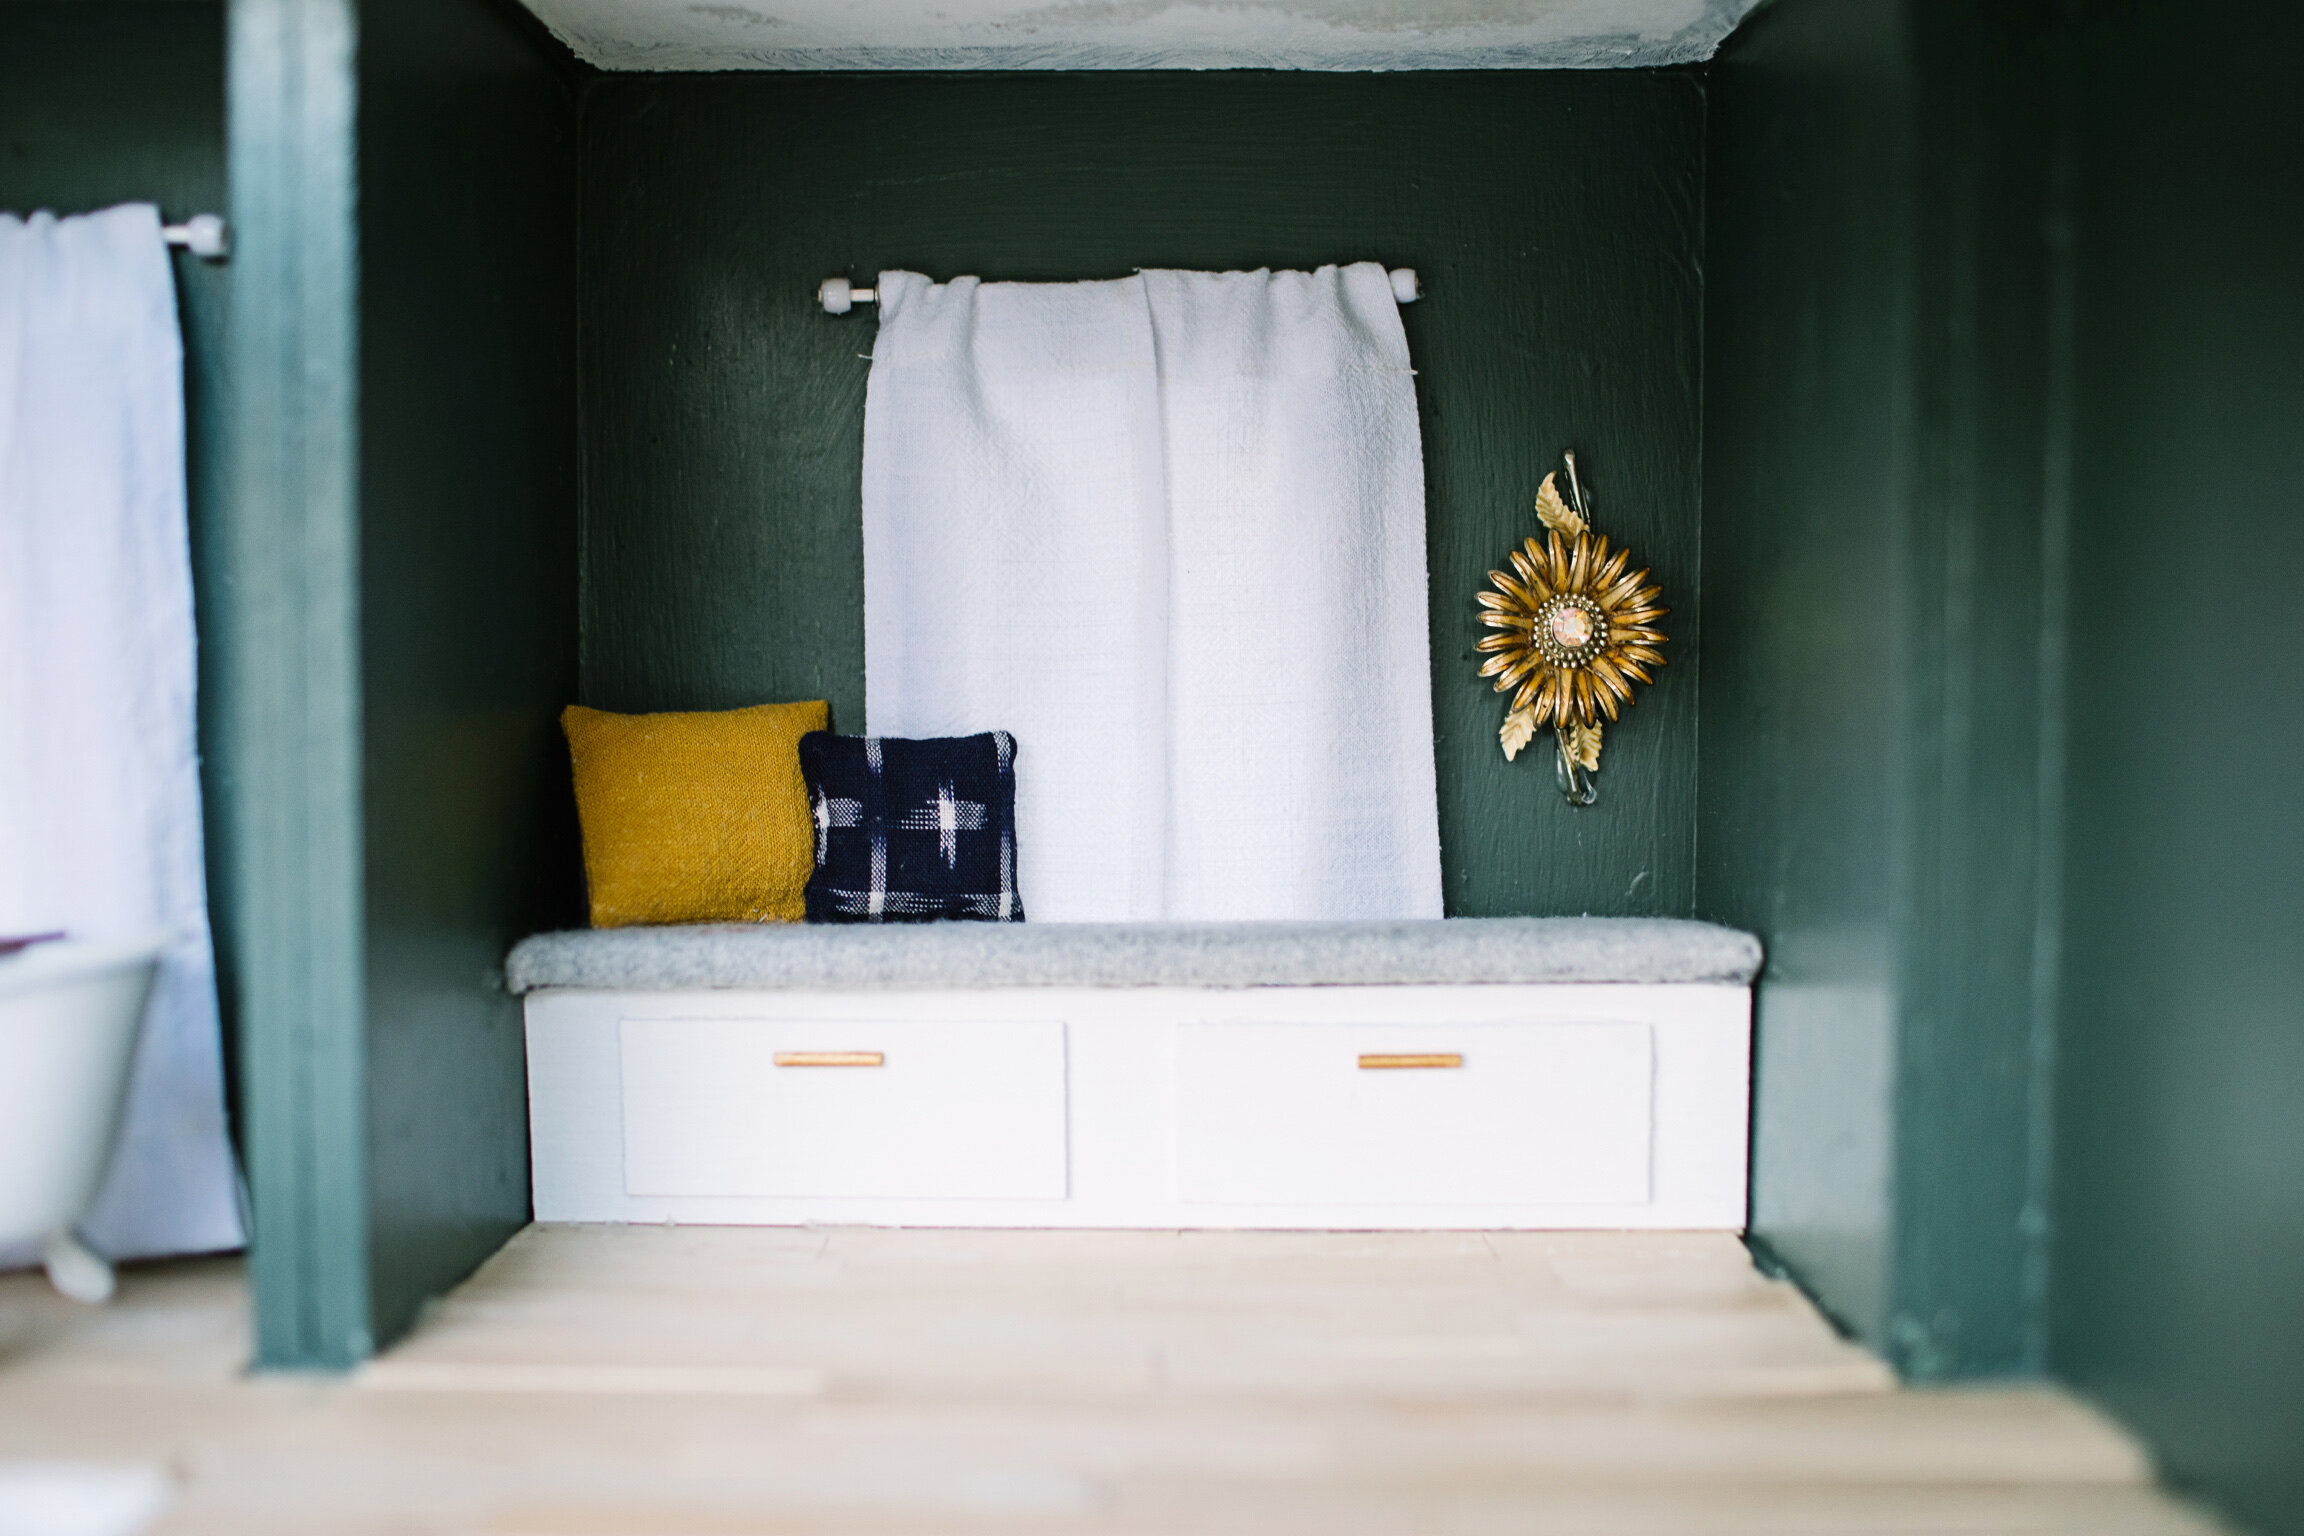
Bay Window is made from Bolsa wood and an X-acto knife. The top is covered in felted fabric. Cotton balls fill the tiny pillows. The golden flower/wall decoration is a vintage brooch from the flea market (you can find similar on Etsy).

Clawfoot Bathtub is a soap dispenser from Amazon, spray painted white. A wood-stained popsicle stick serves as the bathtub shelf. Tiny jars from Etsy are filled with pink salt, then the jar lids were hot-glued down. The floral print is from Rylee and Cru, frame from Hobby Lobby.

If you are expecting, let me introduce you to the SNOO. It is basically a night-nurse who will sleep train your baby for you, no joke. To see why I can’t live without it and encourage EVERY new parent to do whatever it takes to get one in your home, see my full review here. I made the Snoo replica with styrofoam, floral wire, and a plastic cup.
KITCHEN
I used an X-acto knife to cut bolsa wood for the custom cabinets/countertops. I wood-stained the top piece and painted the cabinets with white semi-gloss. I dipped a ping-pong ball in gold acrylic paint and super-glued to a small wood piece, then the ceiling. The “Utensil Holder” is a coffee stir-stick from Starbucks, darkened with wood stain and hot-glued to the wall. I made curtains, threaded them through a painted bamboo skewer and hot glued plastic beads on the end. They are attached to the wall with “mini screw eye pins.”
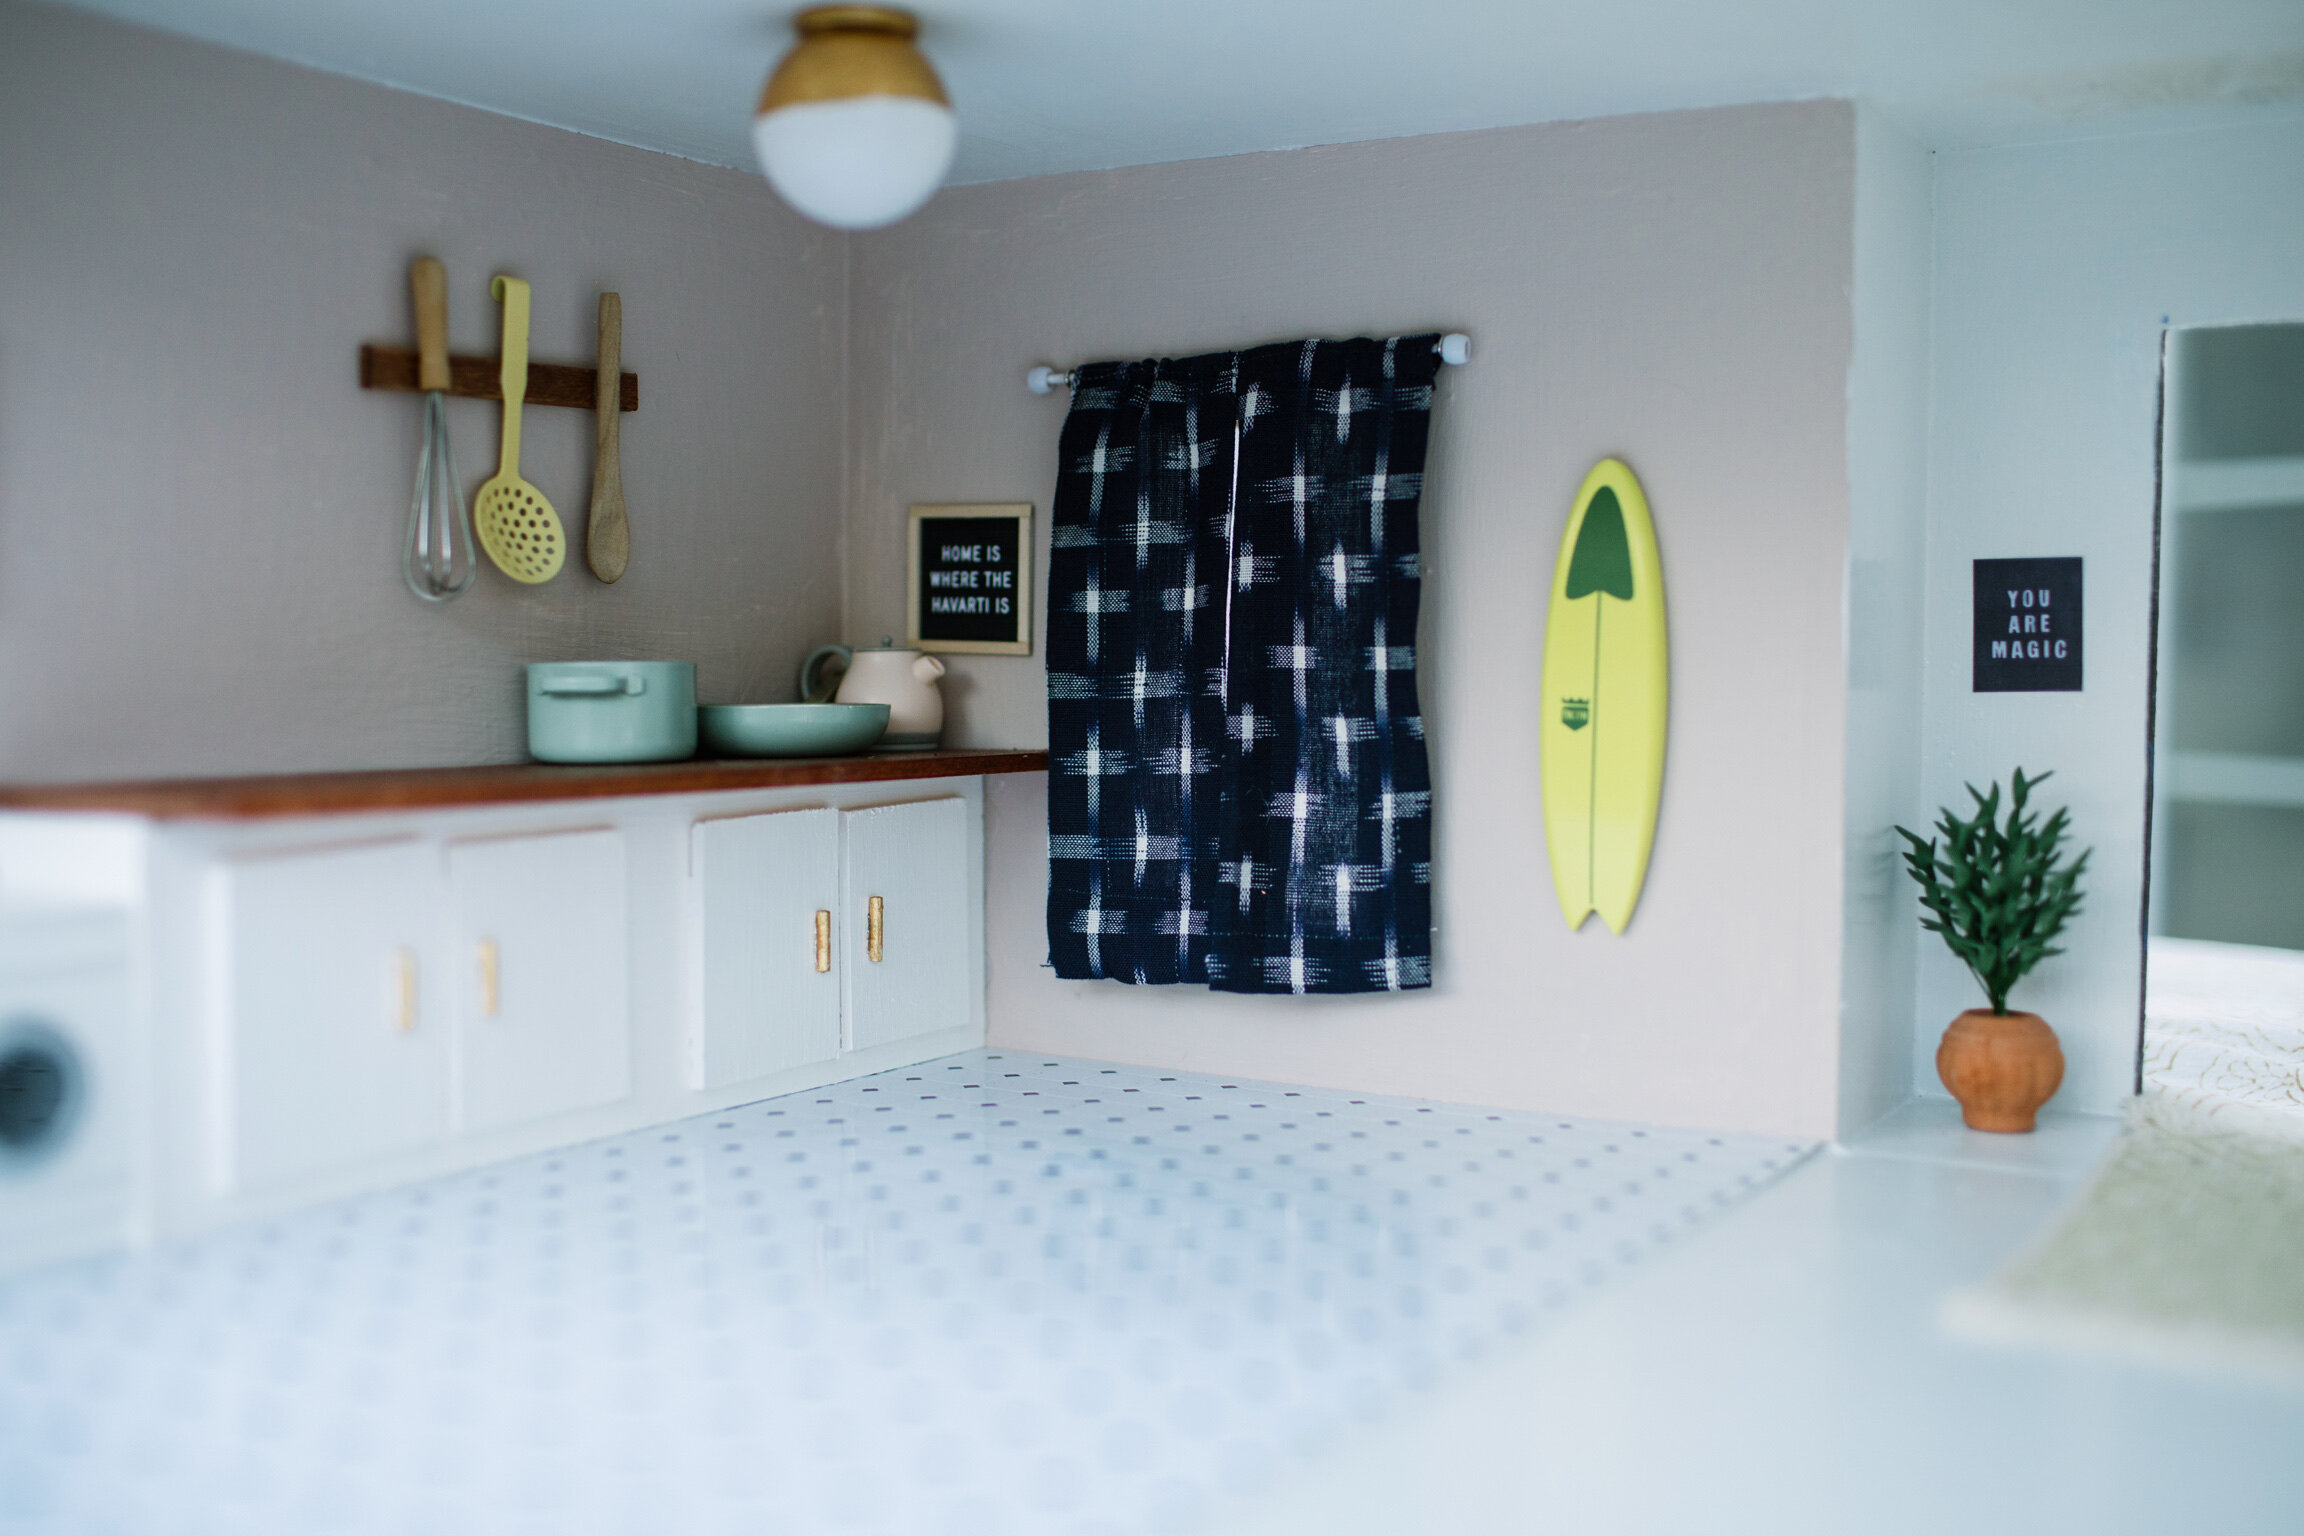
Flooring is available at Hobby Lobby and Etsy. Magnetic Surfboard is from CandyLab Toys. All kitchen utensils and pots/pans from the Maileg Kitchen set (note that the photo looks like you get a stove and cabinet, but those are just the box).

“Home is Where the Havarti is” custom letter board from SmallFunShop. My other home has “Life is Gouda.” Tea Kettle from Etsy.

Dining room set from Hobby Lobby (I painted the chairs). I hot-glued a strip of fabric for the table runner. Vase is a glass bead from Joann’s. These AMAZING FLOWERS are handmade from Etsy!!! “Swoop” painting printed with permission from Britt Bass Turner (we have this in our real bedroom!).
Time for our BIG ANNOUNCEMENT:
We are so excited to add a new baby mouse to our house in very late March!!!

Mouse family of 4 coming soon!!! Mice are from Maileg. Tutorial for sectional is from A Square to Spare. Hopefully I can re-make ours in the future!

This kids’ mouse-paw art is such a darling idea that my friend, Lazer, though of! I used the end of a paintbrush to make the shapes (and googled ‘Mouse Paw Print)’. The frames are coffee stir sticks. Can’t wait to add baby girl’s name once we can agree!